
Cart
The shopping cart is a key part of an online store. MiniShop3 provides a flexible system for displaying the cart anywhere on the site.
Multiple carts on a page
MiniShop3 allows any number of carts on a single page. Each cart can have its own template and update automatically when content changes.
The key parameter is selector. It specifies the CSS selector of the wrapper element whose content will be updated automatically when the cart is modified.
Example: main cart and mini-cart in the header
fenom
{* Mini-cart in the site header *}
<div id="header-mini-cart">
    {'!msCart' | snippet : [
        'tpl' => 'tpl.msMiniCart',
        'selector' => '#header-mini-cart',
        'includeThumbs' => 'small'
    ]}
</div>

{* Main cart on the page *}
<div id="main-cart">
    {'!msCart' | snippet : [
        'tpl' => 'tpl.msCart',
        'selector' => '#main-cart',
        'includeThumbs' => 'medium'
    ]}
</div>
When a product is added or quantity changed, both carts update automatically — each with its own template.
How it works
When the snippet is called with the selector parameter, MiniShop3 registers a "token → selector" pair in JavaScript. When the user performs a cart action, the server re-renders HTML for each registered token and returns it to the client, where JavaScript updates the corresponding DOM elements.
Cart JavaScript scripts
Cart behavior on the frontend is provided by a set of JavaScript modules:
| File | Purpose |
|---|---|
js/web/ms3.js | Main ms3 object, initialization of all modules |
js/web/core/CartAPI.js | API client for cart operations (add, remove, change, clean) |
js/web/ui/CartUI.js | UI handlers: +/- buttons, remove, HTML auto-update |
js/web/core/TokenManager.js | Cart authorization token management |
js/web/core/ApiClient.js | HTTP client for server requests |
Loading scripts
Scripts are loaded automatically by the MiniShop3 plugin on pages where cart or checkout snippets are called.
For manual loading:
html
<script src="/assets/components/minishop3/js/web/ms3.min.js"></script>Ready event
After initialization, MiniShop3 fires an event:
javascript
document.addEventListener('ms3:ready', function() {
    console.log('MiniShop3 is ready');
});
Cart update event
On any cart change:
javascript
document.addEventListener('ms3:cart:updated', function(e) {
    console.log('Cart updated:', e.detail);
    // e.detail contains cart data: products, total
});
Cart contents and available fields
Basic product fields in the cart
Each cart item contains:
| Field | Description |
|---|---|
product_key | Unique cart line key |
product_id | Product ID (MODX resource) |
count | Quantity |
price | Unit price |
cost | Line total (price × count) |
weight | Unit weight |
old_price | Old price (if discounted) |
discount_price | Unit discount amount |
discount_cost | Line discount amount |
pagetitle | Product name |
article | SKU |
options | Selected options array |
Totals
| Field | Description |
|---|---|
total.count | Total item quantity |
total.positions | Number of lines (unique products) |
total.cost | Total cost |
total.weight | Total weight |
total.discount | Total discount amount |
Adding images
To output product images, use the includeThumbs parameter:
fenom
{'!msCart' | snippet : [
    'includeThumbs' => 'small'
]}
The chunk will have the thumb field available:
fenom
{foreach $products as $product}
    {if $product.thumb?}
        <img src="{$product.thumb}" alt="{$product.pagetitle}">
    {/if}
{/foreach}
For multiple sizes:
fenom
{'!msCart' | snippet : [
    'includeThumbs' => 'small,medium,large'
]}

{* In the chunk *}
<img src="{$product.small}" alt="">  {* Small thumbnail *}
<img src="{$product.medium}" alt=""> {* Medium thumbnail *}
Adding TV parameters
To output product TV fields, use the includeTVs parameter:
fenom
{'!msCart' | snippet : [
    'includeTVs' => 'brand,material,country'
]}
In the chunk, TVs are available directly:
fenom
{foreach $products as $product}
    <p>Brand: {$product.brand}</p>
    <p>Material: {$product.material}</p>
    <p>Country: {$product.country}</p>
{/foreach}
Adding product options
Options selected when adding a product to the cart are available in two ways:
1. options array:
fenom
{if $product.options?}
    {foreach $product.options as $name => $value}
        <span>{$name}: {$value}</span>
    {/foreach}
{/if}
2. Separate fields with the option_ prefix:
fenom
{if $product.option_size?}
    <span>Size: {$product.option_size}</span>
{/if}
{if $product.option_color?}
    <span>Color: {$product.option_color}</span>
{/if}
Vendor data
If the product has a vendor, vendor data is available with the vendor. prefix:
fenom
{if $product.vendor.name?}
    <p>Vendor: {$product.vendor.name}</p>
    {if $product.vendor.logo?}
        <img src="{$product.vendor.logo}" alt="{$product.vendor.name}">
    {/if}
{/if}
Built-in chunks
MiniShop3 includes two ready-made chunks for cart output:
tpl.msCart — full cart
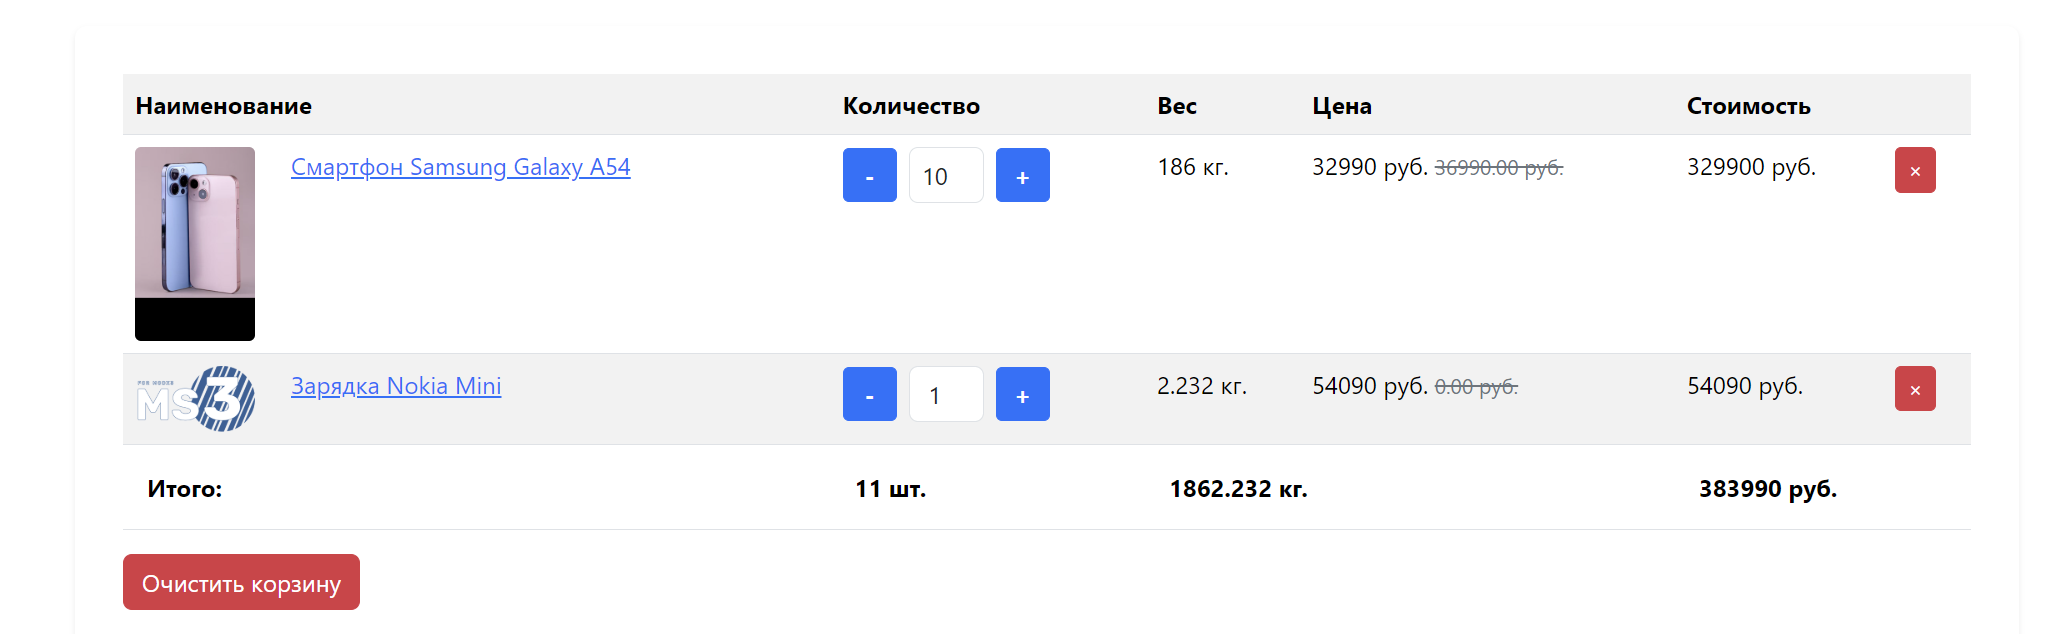
Tabular output with all controls:
- Product image
- Name with link
- Option selection (color, size)
- Quantity change buttons (+/-)
- Remove item
- Total row
fenom
{'!msCart' | snippet : [
    'tpl' => 'tpl.msCart',
    'includeThumbs' => 'small'
]}
tpl.msMiniCart — compact cart
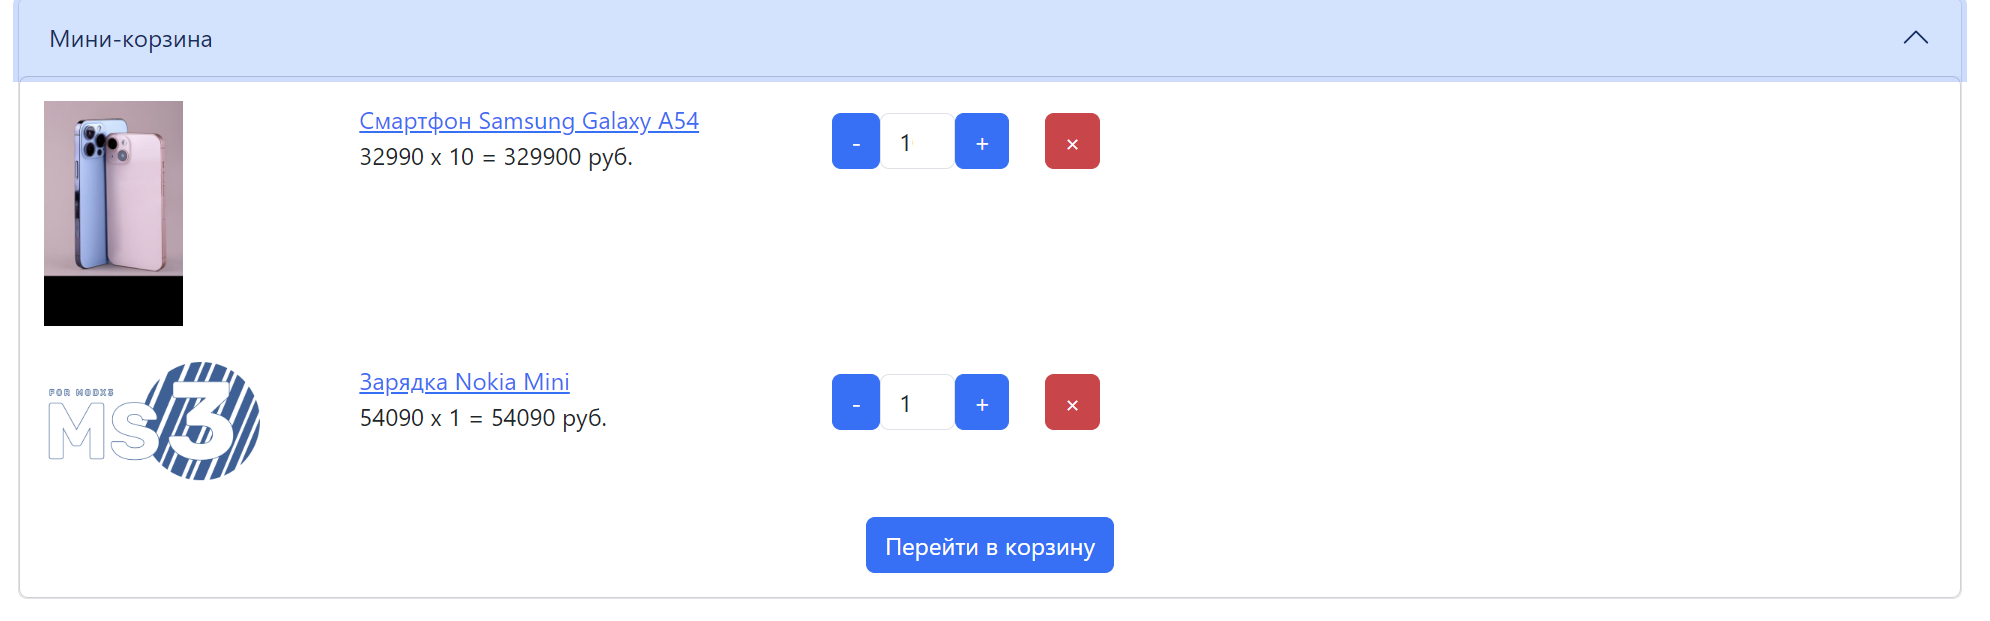
Compact view for the site header or sidebar:
- Compact product list
- Button to go to the cart page
fenom
{'!msCart' | snippet : [
    'tpl' => 'tpl.msMiniCart',
    'includeThumbs' => 'small'
]}
Customization
Copy the default chunk and create your own with the desired name. Then specify it in the tpl parameter. Default chunks use Bootstrap 5, but you can adapt the markup to any CSS framework.
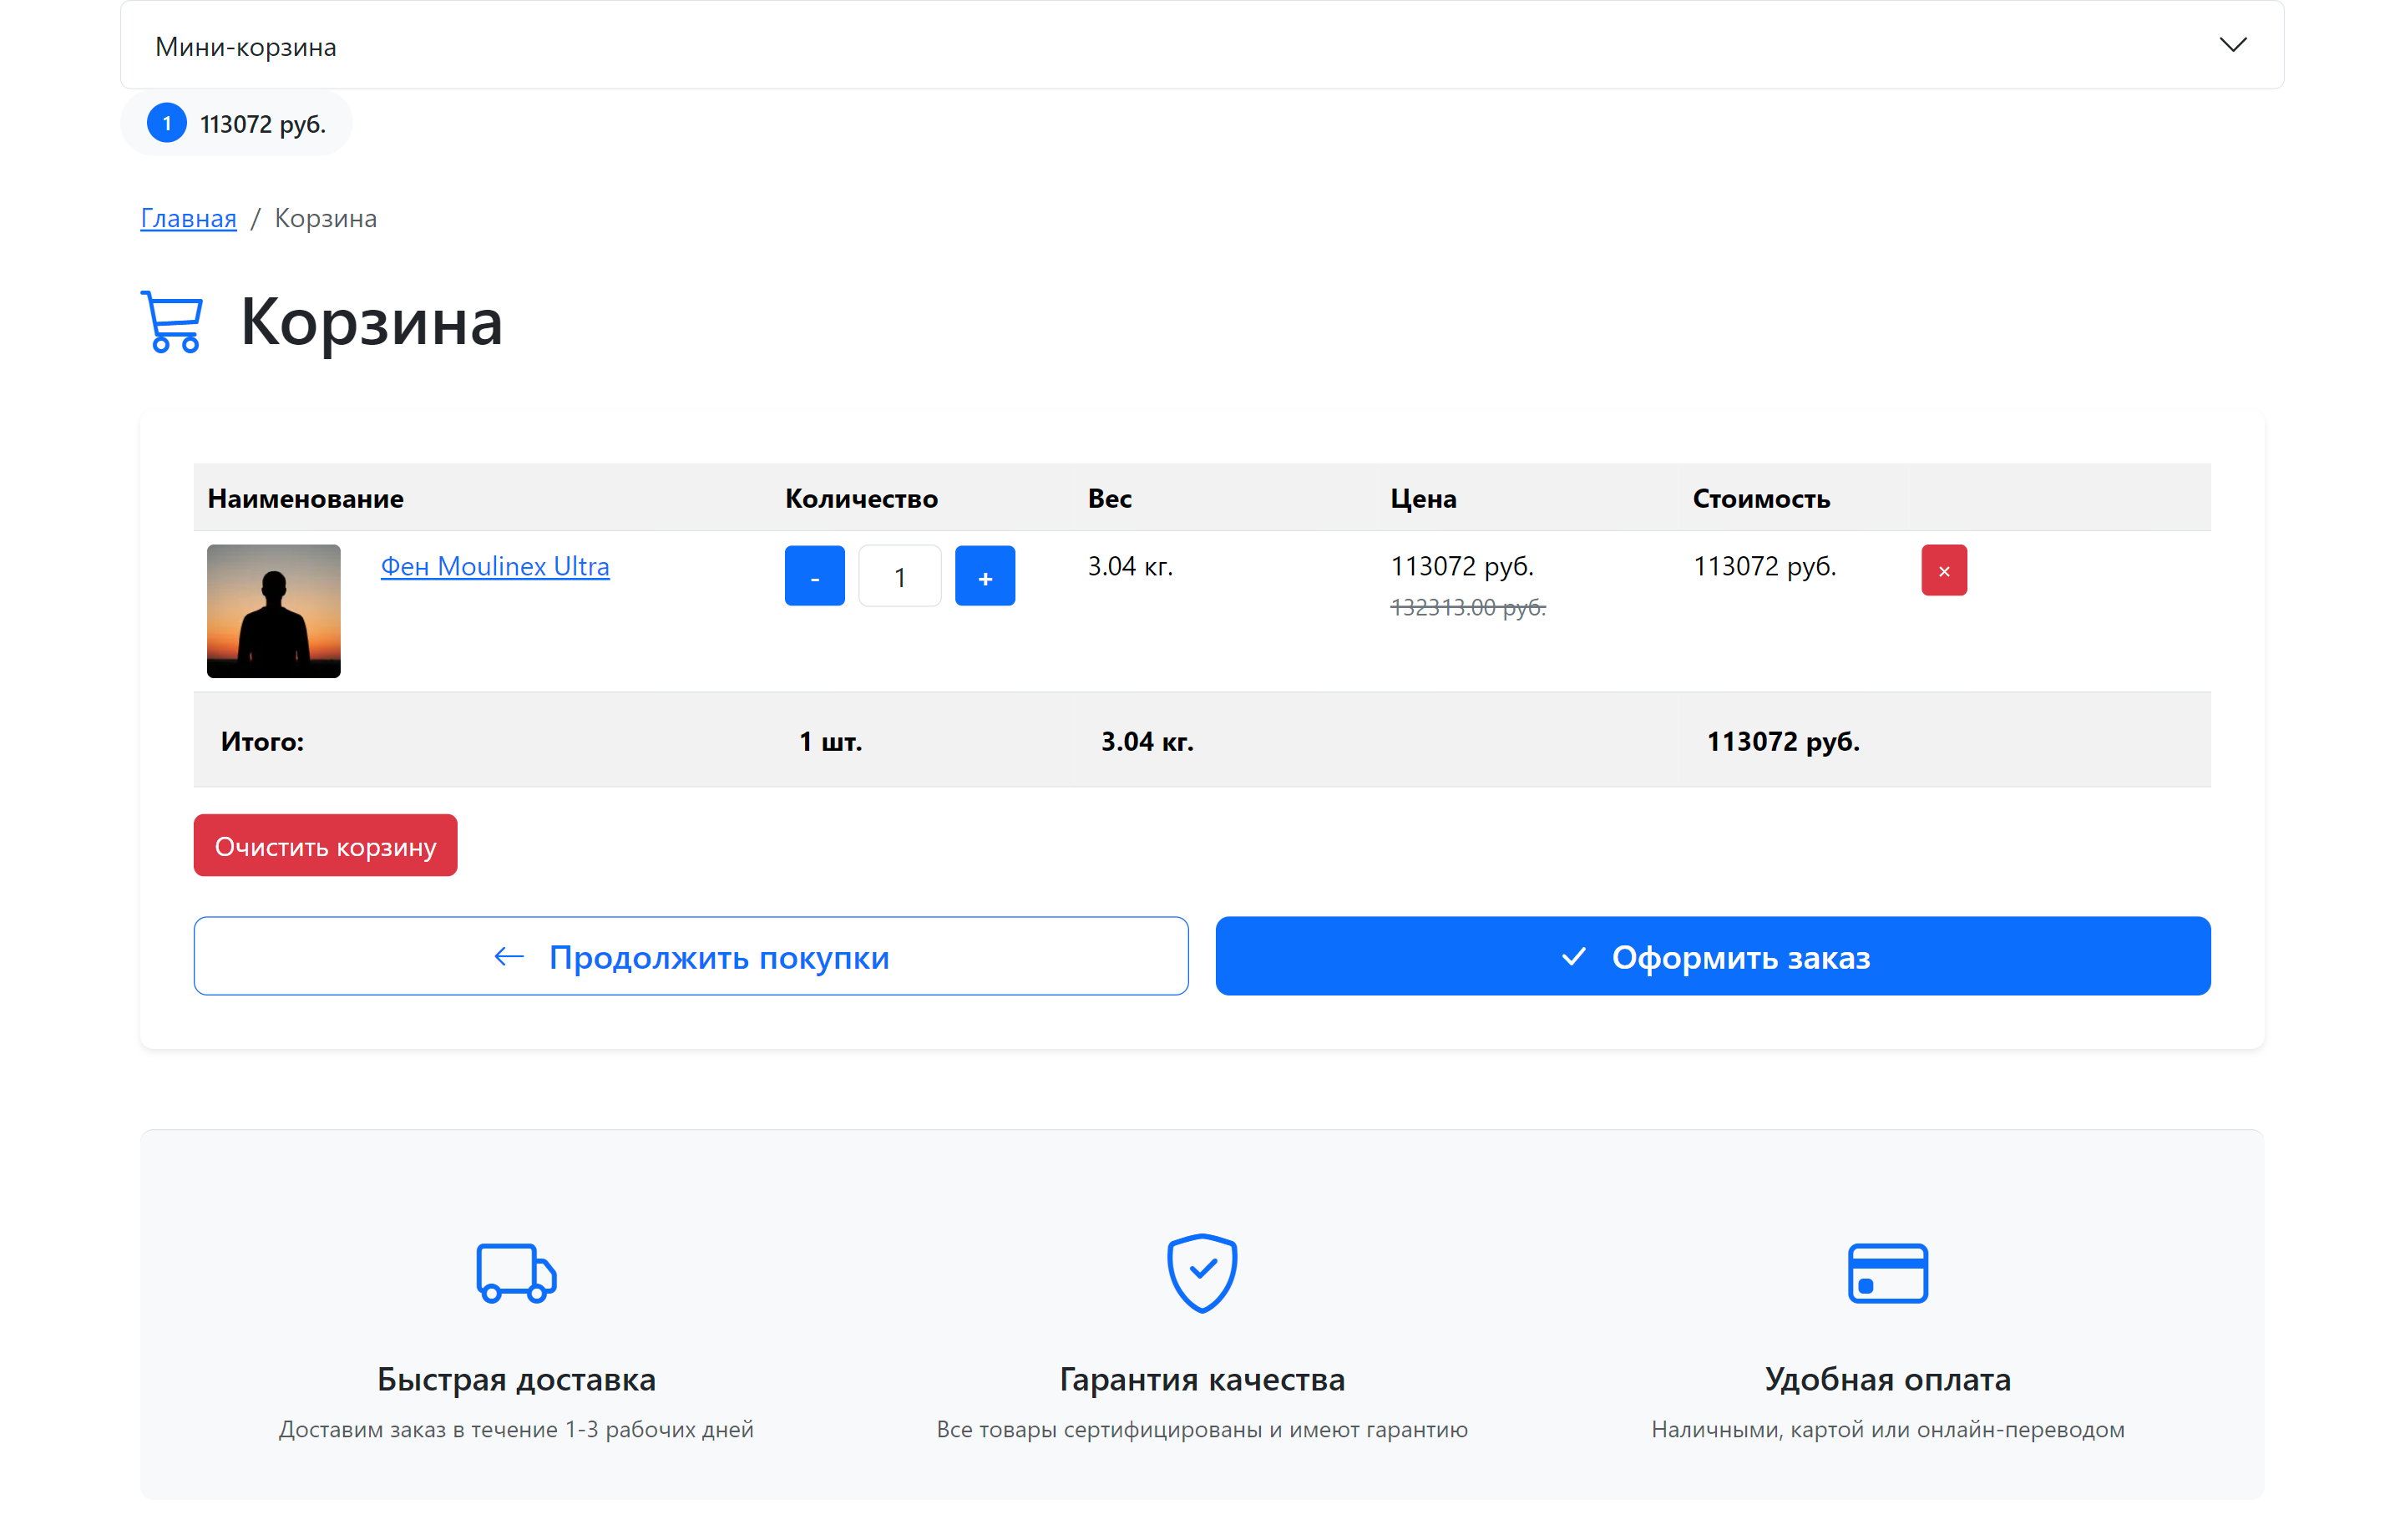
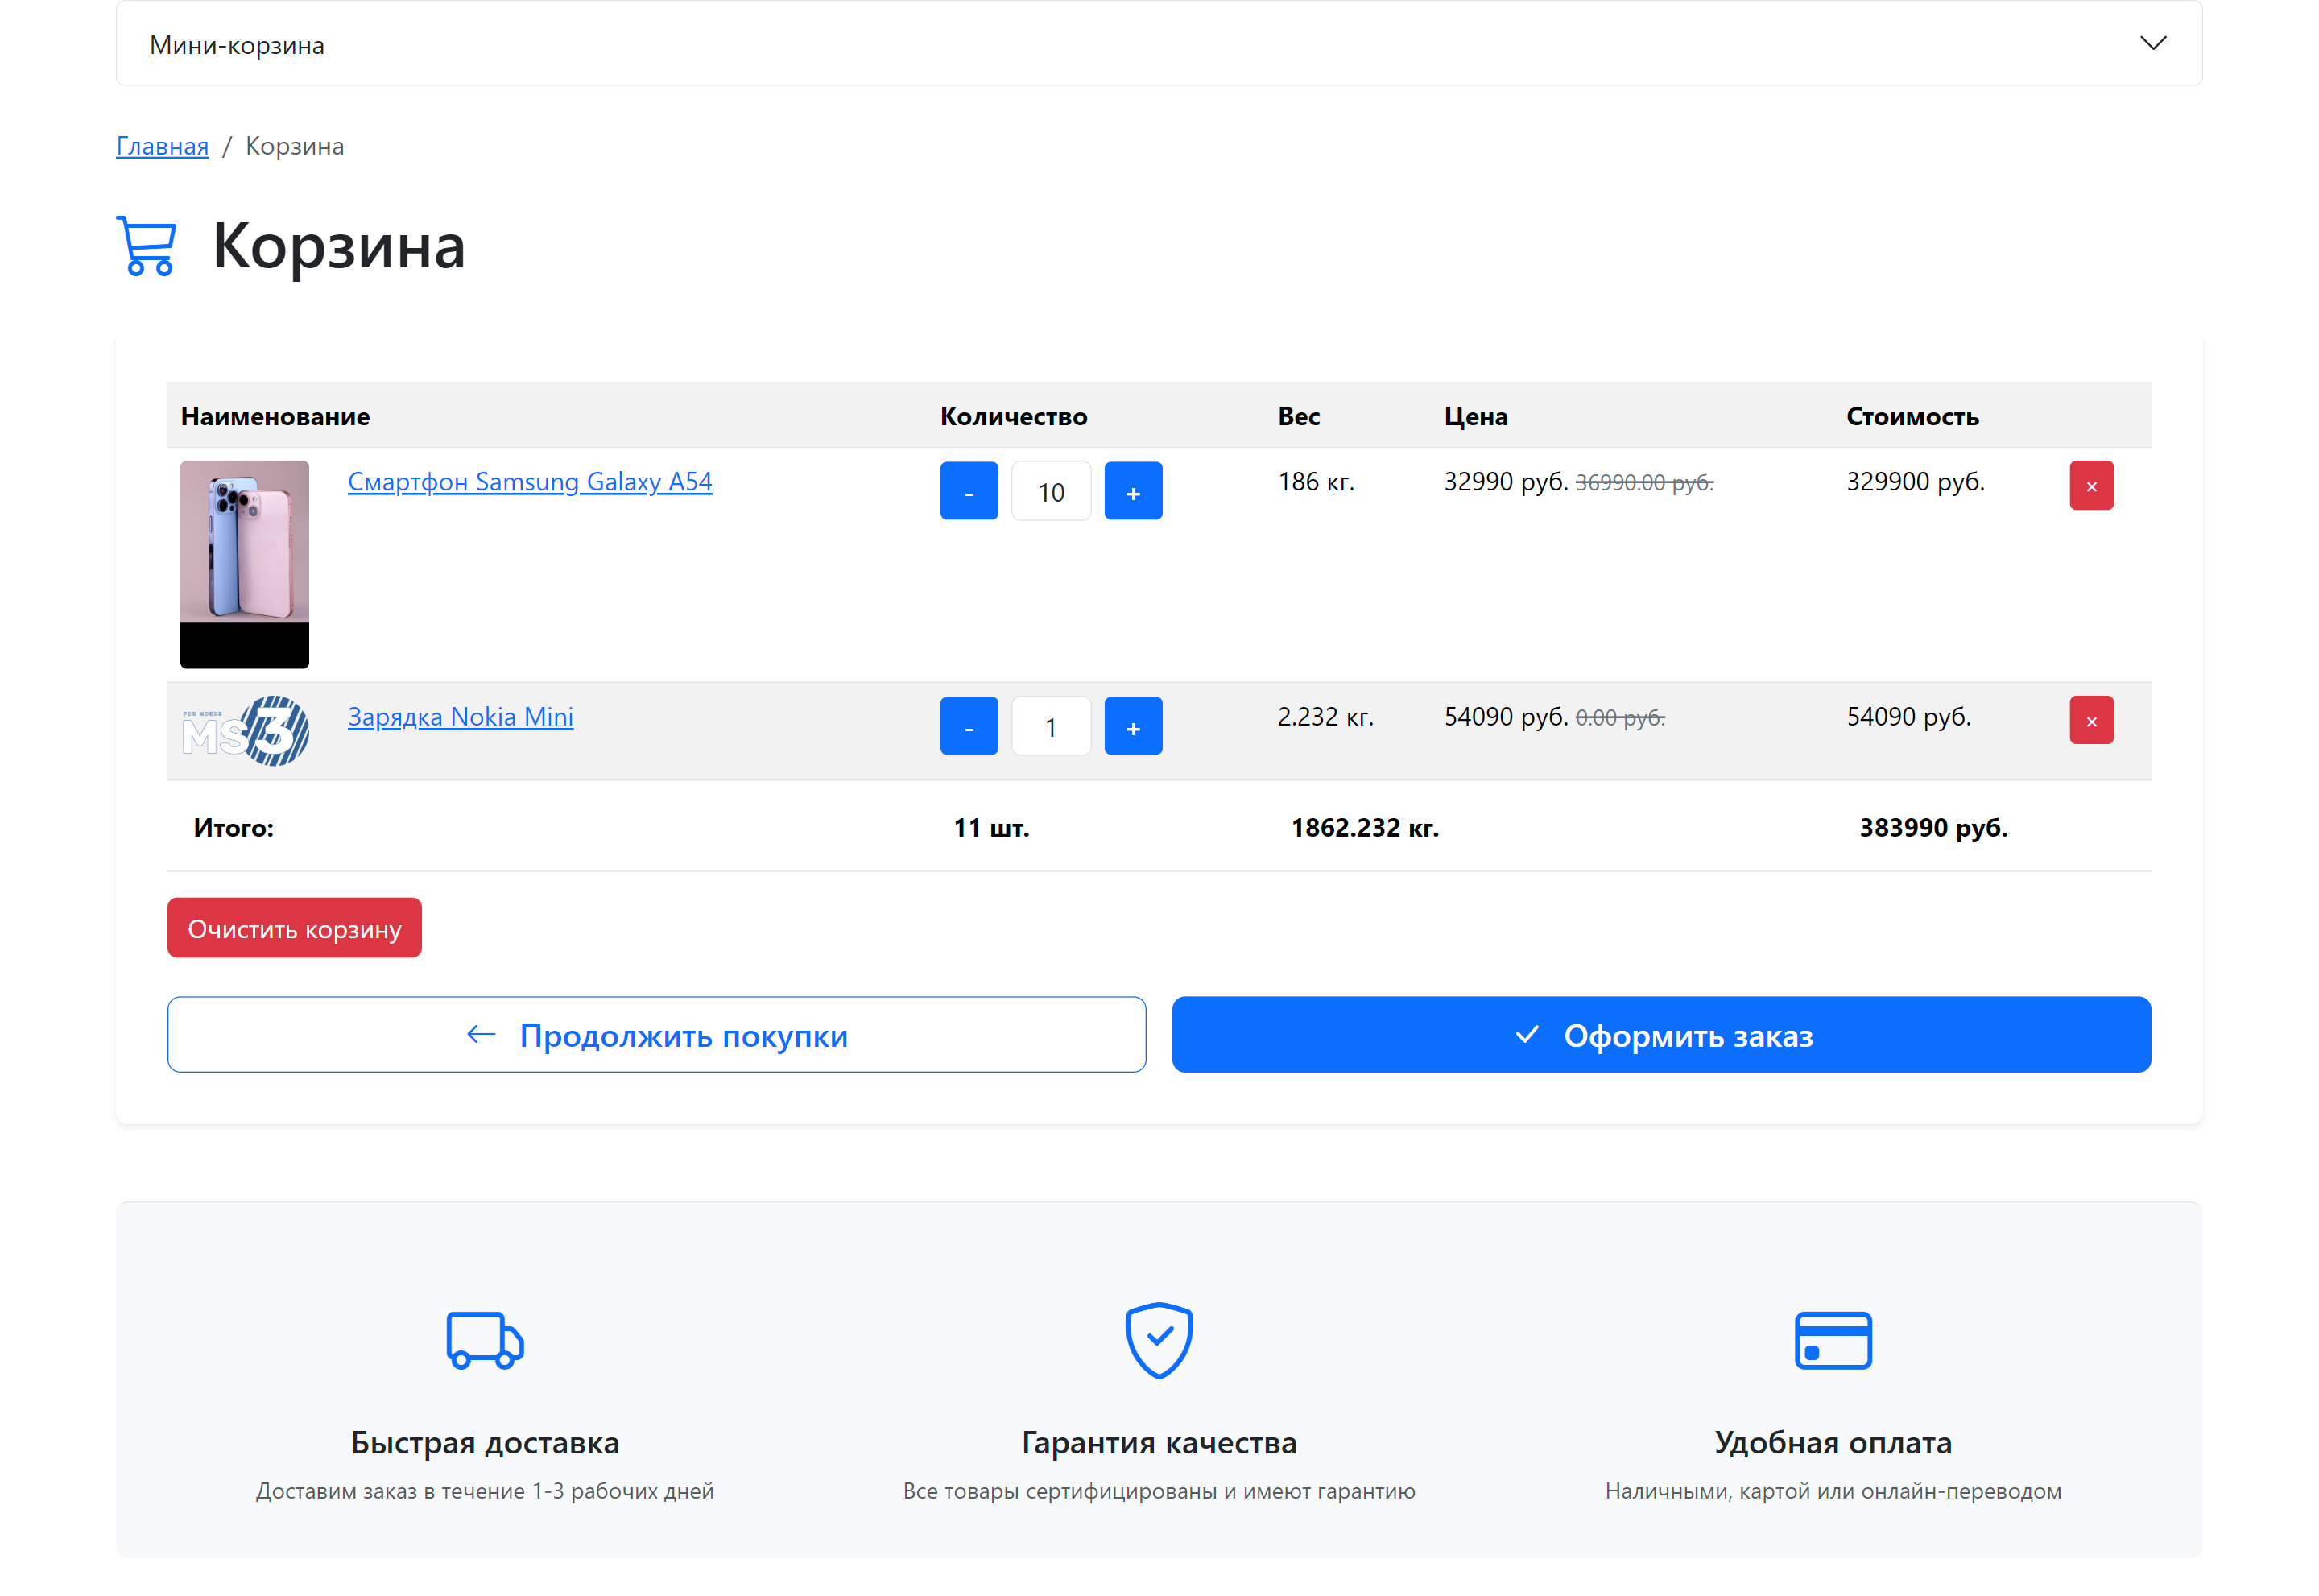
Demo cart page template
MiniShop3 ships with a ready-made demo cart page template:
core/components/minishop3/elements/templates/cart.tplThe template demonstrates the recommended cart page structure and includes:
- Breadcrumbs — site navigation
- Page title — with icon and description from
introtext - msCart snippet call — with the
selectorparameter for auto-update - Action buttons — "Continue shopping" and "Checkout" (hidden automatically when the cart is empty)
- Benefits block — delivery, warranty, and payment information
- CSS styles — cart styling and responsiveness
- JavaScript — button visibility logic based on cart state
Usage
- Create a new template in MODX (Elements → Templates)
- Copy the contents of
cart.tplor point to the file path - Assign the template to the cart page
Inheritance
The demo template uses Fenom inheritance ({extends 'file:templates/base.tpl'}). Make sure the base template exists, or replace it with your own structure.
Configuration
The template uses system settings:
ms3_order_page_id— checkout page ID (for the "Checkout" button)
Lexicons:
ms3_frontend_continue_shopping— "Continue shopping" button textms3_frontend_checkout— "Checkout" button text
Forms and actions
For cart forms, use the ms3_form class and the hidden ms3_action field:
html
{* Change quantity *}
<form class="ms3_form">
    <input type="hidden" name="product_key" value="{$product.product_key}">
    <input type="hidden" name="ms3_action" value="cart/change">
    <input type="number" name="count" value="{$product.count}" min="1">
    <button type="submit">Update</button>
</form>

{* Remove item *}
<form class="ms3_form">
    <input type="hidden" name="product_key" value="{$product.product_key}">
    <input type="hidden" name="ms3_action" value="cart/remove">
    <button type="submit">Remove</button>
</form>

{* Clear cart *}
<form class="ms3_form">
    <input type="hidden" name="ms3_action" value="cart/clean">
    <button type="submit">Clear cart</button>
</form>
Programmatic control
JavaScript API for working with the cart:
javascript
// Add product
await ms3.cartUI.handleAdd(productId, count, options);

// Change quantity
await ms3.cartUI.handleChange(productKey, newCount);

// Remove product
await ms3.cartUI.handleRemove(productKey);

// Clear cart
await ms3.cartUI.handleClean();
Low-level API (without UI auto-update):
javascript
// Direct API requests
const result = await ms3.cartAPI.add(productId, count, options);
const result = await ms3.cartAPI.change(productKey, count);
const result = await ms3.cartAPI.remove(productKey);
const result = await ms3.cartAPI.clean();
const cart = await ms3.cartAPI.get();