
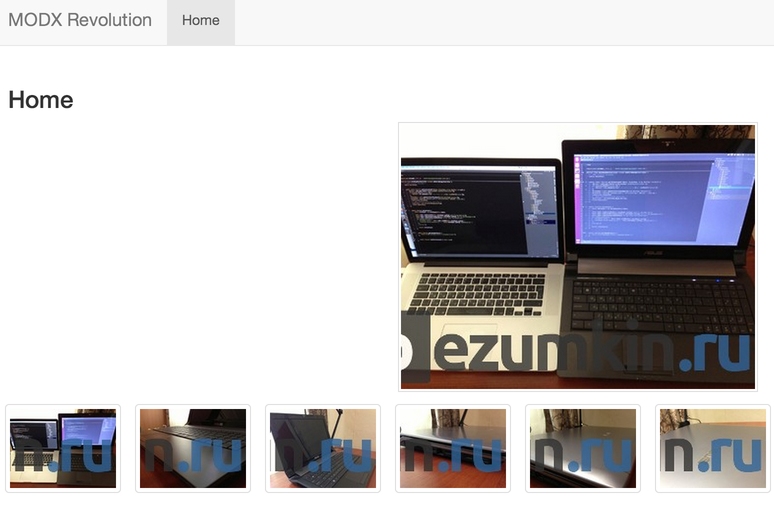
Thumbnail Generation
A strength of ms2Gallery is that it generates all thumbnails on upload. That avoids the need for dynamic resizing when displaying images on the site, which is often slow.
Generation Settings
All galleries are tied to a file source; thumbnail generation uses that source's settings.
- basePath — path to the directory with uploaded files and thumbnails on the server. Default:
assets/images/products/. - basePathRelative — whether basePath is relative to the site root. Default: yes.
- baseUrl — URL for accessing files and thumbnails from outside. Default:
assets/images/products/. - baseUrlRelative — whether baseUrl is relative to the site root. Default: yes.
- allowedFileTypes — allowed upload types. Default:
jpg,jpeg,png,gif. - imageExtensions — list of extensions in allowedFileTypes that are images. Default:
jpg,jpeg,png,gif. - thumbnailType — default thumbnail format. Usually jpg.
- thumbnailQuality — thumbnail quality. Default: 90%.
- skipFiles — list of file extensions to hide from the list. Default includes
.svn,.git,_notes,nbproject,.idea,.DS_Store. - maxUploadWidth — maximum source width. If the uploaded image is wider, it is resized in the browser and the server stores an image with this max width. Default: 1980px.
- maxUploadHeight — same for height. Default: 1080px.
- maxUploadSize — maximum file size. Default: 10Mb.
- imageUploadDir — upload order. 1 (default) — append to list, 0 — prepend.
- imageNameType — thumbnail name generation. hash — unique name from file content. Friendly (default) — web-safe name: non-alphanumeric removed, lower case, spaces to hyphens.
- thumbnails — main parameter: array of phpThumb settings for thumbnail generation. Example:
json
{
  "small": {
    "w":120,
    "h":90,
    "q":90,
    "zc":1,
    "bg":"000000"
  },
  "medium": {
    "w":360,
    "h":270,
    "q":90,
    "zc":1,
    "bg":"000000"
  }
}
Each entry creates one thumbnail; this example yields two files: 120x90 and 360x270.
Before 2.0, thumbnail size was used as its alias and files were stored as: assets/images/products/resource_id/120x90/filename and assets/images/products/resource_id/360x270/filename
From 2.0 you can set an alias as the array key. In our example: assets/images/products/resource_id/small/filename and assets/images/products/resource_id/medium/filename
This is more convenient because you often want only max width or height and the other dimension calculated from the source aspect ratio.
Main phpThumb Parameters
- w — max width in pixels
- h — max height in pixels
- wp — max width for portrait images
- hp — max height for portrait images
- wl — max width for landscape images
- hl — max height for landscape images
- ws — max width for square images
- hs — max height for square images
- f — file format:
jpeg,pngorgif - q — JPEG quality:
1worst,95best - zc — zoom-crop: scale and crop to fit the given dimensions.
- (requires
wandh, overridesiarandfar). 1orC— crop from center.- Use
T,B,L,R,TL,TR,BL,BRfor top/bottom/left/right and combinations. - All except
Crequire ImageMagick.
- (requires
- bg — background fill hex color (
000000,ffffff, etc.) - ra — rotate by angle in degrees. Negative — clockwise, positive — counterclockwise.
- ar — auto-rotate.
x— rotate as in EXIF.Llandscape,Pportrait,lProtate clockwise,Lpcounterclockwise.
- aoe — Output Allow Enlarging: allow thumbnails larger than source:
1or0.farandiaroverride this. - iar — Ignore Aspect Ratio: draw exactly to
wandh(both required). Overrides far. - far — Force Aspect Ratio: fit to
wandh(both required). Alignment:Lleft,Rright,Ttop,Bbottom,Ccenter.BL,BR,TL,TR— correct direction for landscape/portrait.
If you set only width or height, the other is calculated from the source aspect ratio. For more phpThumb options see its documentation.
Watermark
To add watermarks, three conditions must be met.
1. ImageMagick must be installed on the server and available to PHP. Details.
2. In the ms2Gallery file source add fltr with wmi:
json
{
  "small": {"w":120,"h":90,"q":90,"zc":"1","bg":"000000","fltr":"wmi|wm.png|BR|80"},
  "medium": {"w":360,"h":270,"q":90,"zc":"1","bg":"000000","fltr":"wmi|wm.png|BR|80"}
}
Parameter meaning:
"wmi" (WaterMarkImage)
  [ex: &fltr[]=wmi|<f|<a|<o|<x|<y|<r] where
  <f is the filename of the image to overlay;
  <a is the alignment (one of BR, BL, TR, TL, C,
    R, L, T, B, *) where B=bottom, T=top, L=left,
    R=right, C=centre, *=tile)
    *or*
    an absolute position in pixels (from top-left
    corner of canvas to top-left corner of overlay)
    in format {xoffset}x{yoffset} (eg: "10x20")
    note: this is center position of image if <x
    and <y are set
  <o is opacity from 0 (transparent) to 100 (opaque)
    (requires PHP v4.3.2, otherwise 100% opaque);
  <x and <y are the edge (and inter-tile) margin in
    pixels (or percent if 0 < (x|y) < 1)
    *or*
    if <a is absolute-position format then <x and
  <y represent maximum width and height that the
    watermark image will be scaled to fit inside
  <r is rotation angle of overlaid watermark
3. Place the wm.png file in /assets/components/ms2gallery/ — that is where it is looked for. If you renamed the assets folder during MODX advanced install, use that path instead.
In the source you can specify images/wm.png — then put the file in /assets/components/ms2gallery/images/.
If everything is set correctly, watermarks will appear on images when uploaded to the gallery.
Your hosting must support image processing such as watermarking.
Examples
Disable enlarging thumbnails (when thumbnail size is larger than the uploaded file):
json
{"big":{"wp":1920,"aoe":0,"far":0,"iar":0}}aoe disables enlarging, but iar and far override it — they must be set to 0.
Updating Thumbnails
You can selectively regenerate thumbnails in the manager:
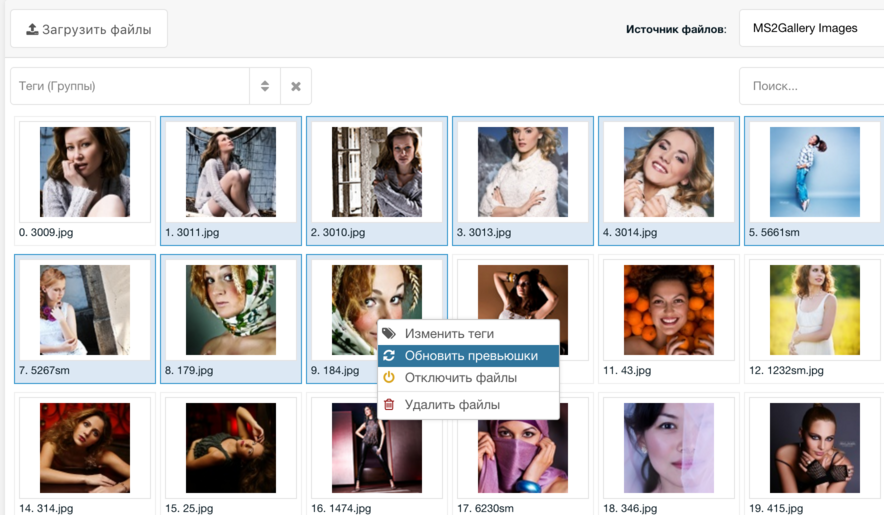
You can select multiple items with Shift or Ctrl ⌘ Cmd
To regenerate all thumbnails on the site according to their file source settings, run from the server console: generate.php from core/components/ms2gallery/cli. For example:
shell
php ~/www/core/components/ms2gallery/cli/generate.phpTo regenerate all thumbnails from your own script:
php
$modx->addPackage('ms2gallery', MODX_CORE_PATH . 'components/ms2gallery/model/');

$files = $modx->getIterator('msResourceFile', array('parent' => 0));
foreach ($files as $file) {
  $children = $file->getMany('Children');
  foreach ($children as $child) {
    $child->remove();
  }
  $file->generateThumbnails();
}
If you use watermarks, ensure the file source uses an absolute path from the site root, e.g. /assets/components/ms2gallery/img/wm.png.