

Getting Started
This service is linked to our github repository. Any changes made to the repository are displayed on the site.
From the inside, the project is a Vue application, with a VitePress plugin that converts md markup into beautiful HTML. VitePress also provides tools that spruce up the strict style of md markup.
All you need is to change the text inside a specific *.md file (or create a new file/directory) and send a Pull Request with your changes.
You can change or add new text in different ways. The easiest way is to do it right inside github. It has enough tools for working with text. But to track the quality of the changes (especially if you add visual design to the text) will not work. You need to deploy the project locally on your computer.
Easiest way to make changes to the documentation
The quickest and easiest way to make small edits is to do it right inside the github repository.
INFO
You must have a GitHub account (simple signup).
Select the required file for editing in the docs/components/ directory.
Recommended way to make changes to the documentation
INFO
For the recommended way, you will need git skills (clone, fetch, add, commit, push), as well as the pnpm package manager version 10 or later installed on your computer: it switches to the version from package.json → packageManager by itself, and dependencies are locked in pnpm-lock.yaml. Knowledge and skills of working with Vue are not required.
TIP
Link to step by step instructions How to correctly send a Pull Request to someone else's project
Sign up for GitHub if you don't have an account.
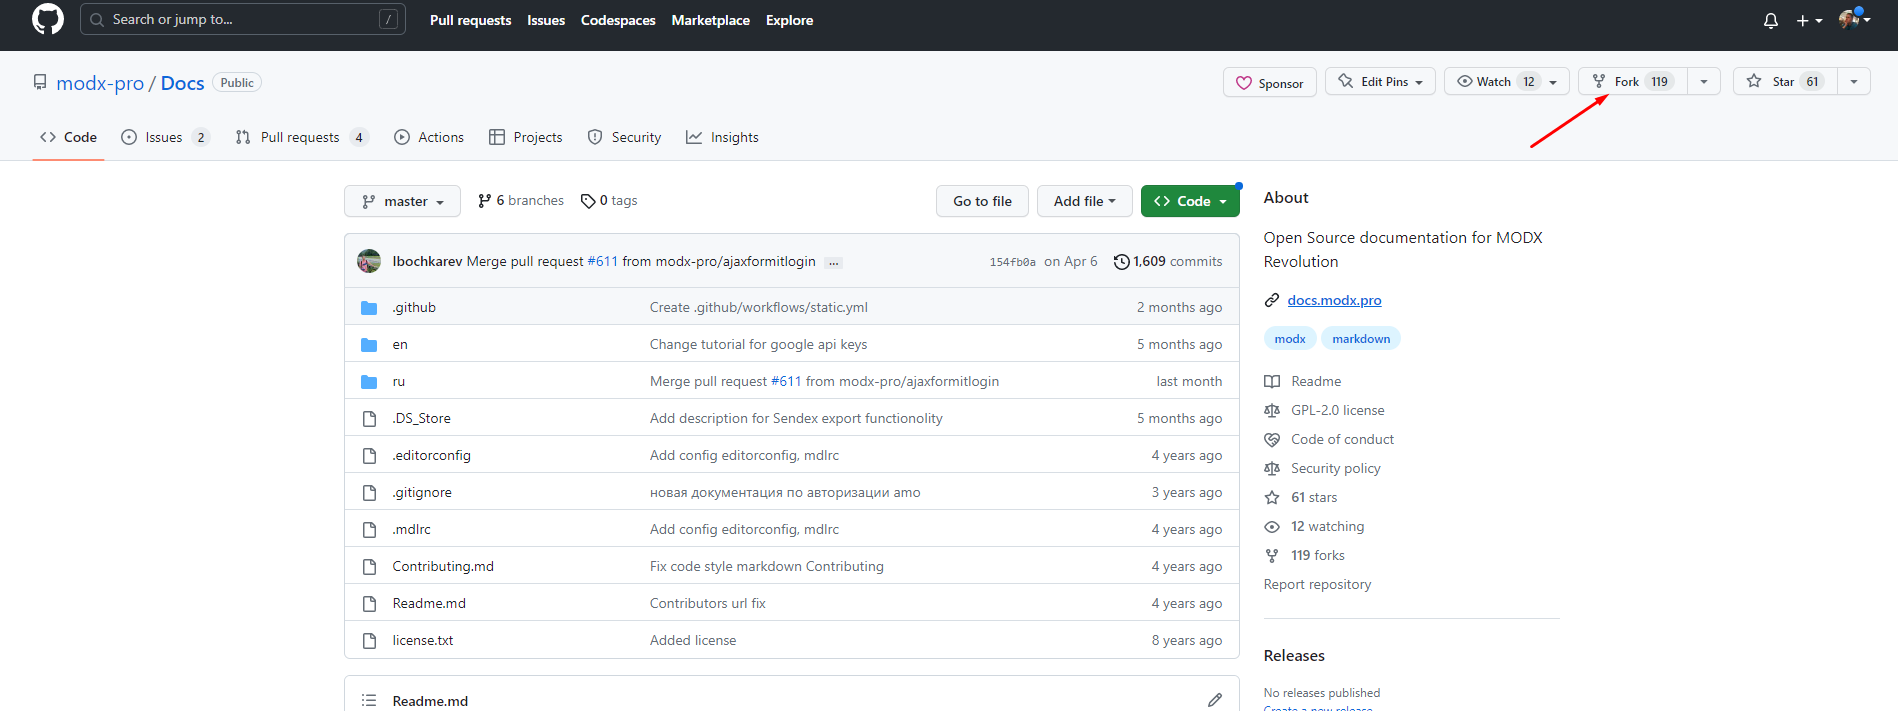
Fork the repository.
WARNING
If you already have a documentation fork, be sure to sync it to get the latest changes.
Clone your fork to your computer.
shellgit clone https://github.com/your-fork/Docs.gitIt is recommended to create a separate branch for the changes you make, but this is not required.
If you want to preview your changes on your computer (recommended) before submitting a Pull Request, install the required dependencies.
shellpnpm install pnpm devMake the required changes to the existing documentation file or create a new one.
Add your changes to git by creating a new commit.
shellgit add . git commit -m "new change in my extra" git push -u origin 999-your-branch-name
Structure of the documentation
All documentation is located in the docs directory.
??docs
 ? ??components     - extras documentation
 ? ??faq            - ready-made solutions, blanks for frequently encountered tasks
 ? ??guide          - documentation for documentation
 ? ??system         - MODX documentation
 ? ??en             - English language documentation
 ? ? ??components
 ? ??public         - logos, images used within the project
 ? ??authors.json   - list of authors
The documentation for extras in the docs/components directory is organized as follows:
You can create one single file with the name of the extra and the extension .md (for example ajaxform.md) and place all the necessary information in it.
You can create a directory with the name of the extra and place any number of .md files inside, according to the theme of your extra. In this case, the main required file will be index.md, which will contain links to other page files.
Naming requirements for files and folders
Use concise file and folder names (for example, use settings instead of system-settings).
Use latin letters. Use only lowercase words. Do not use punctuation other than a hyphen (use to link words).
plop generator
For those who want to add new documentation of the extra to the project, the plop generator script is integrated.
Instructions
After installing the dependencies, you need to enter the following command in the terminal:
shpnpm run generateSo you will run the CLI helper and you will see the following message. Use the ↑ and ↓ keys to select the desired language and press Enter:
? Choose language (Use arrow keys)
  Russian
> English
Next, you will be asked to select a documentation template, there are two of them: Single-page and Multi-page documentation. Select the one you want and press Enter.
? Choose language English
? Choose documentation template (Use arrow keys)
  Single-page documentation
> Multi-page documentation
Now you need to give your extra a name and press Enter as well.
? Choose language English
? Choose documentation template Multi-page documentation
? Enter the component name ?
Finally, you will need to select the language versions of the documentation. By using the ↑ and ↓ keys and pressing the Space you can mark the languages you need. Then press the Enter button.
? Choose language Russian
? Choose documentation template Multi-page documentation
? Enter the component name myFirstComponent
? Select the language versions of the documentation (Press <space> to select, <a> to toggle all, <i> to invert selection, and <enter> to proceed)
 ( ) Russian
>(*) English
Done! You will see something like this in the terminal. This means that the script has created the necessary structure, and you will have to fill out the documentation for your extra.
? Choose language Russian
? Choose documentation template Multi-page documentation
? Enter the component name myFirstComponent
? Select the language versions of the documentation English
?  +! 8 files added
-> \docs\components\myfirstcomponent\events.md
-> \docs\components\myfirstcomponent\index.md
-> \docs\components\myfirstcomponent\quick-start.md
-> \docs\components\myfirstcomponent\interface\categories.md
-> \docs\components\myfirstcomponent\interface\items.md
-> \docs\components\myfirstcomponent\snippets\getcategories.md
-> \docs\components\myfirstcomponent\snippets\getitems.md
-> \docs\components\myfirstcomponent\snippets\index.md
TIP
Of course, you can change the structure, add or change files and directories, the script is intended only for quick deployment of the template structure of the documentation of extra.
Useful commands
From the repository root after pnpm install:
| Command | Purpose |
|---|---|
pnpm dev | Local preview with hot reload (default port is printed by Vite, often 5173) |
pnpm build | Production build (heavy; Node may need extra memory, see package.json scripts) |
pnpm preview | Preview the built static output |
pnpm run lint:changed | Markup checks (markdownlint) on changed lines; pnpm run lint — all files; to fix automatically — pnpm exec markdownlint --fix <path> (pnpm run lint:fix fixes every file in the repo) |
pnpm run spellcheck:changed | Spell check on changed lines (RU and EN); pnpm run spellcheck — all files, see Spell checking |
pnpm run check:sync:changed | New Russian pages have English counterparts; warns when a Russian page changed but its English one didn't |
pnpm run check:structure:changed | In changed pages the English version has at least as many ##/### sections as the Russian one (warnings only); pnpm run check:structure — all pages |
CI runs these checks on every PR that changes docs/. Markup and spelling count only changed lines, so old issues elsewhere in a file don't get in the way. Locally the :changed commands compare against origin/master (run git fetch first; set another base with CHECK_BASE=origin/<branch>).
A new Russian page needs an English one, otherwise the check fails: if there is no translation yet, create a stub with node scripts/sync-docs-en.mjs docs/path/to/page.md — it copies the page to docs/en/ with a TODO note. If you edit a Russian page but not its English counterpart, CI prints a warning: check whether the translation needs the same edit. If a changed page has fewer ##/### sections in English than in Russian, CI prints a warning too.
More on markup and pages: Markdown, VitePress, Frontmatter.
FAQ
Dev server won�t start or build fails
Use Node.js 22.18+ (package.json has "engines": { "node": ">=22.18" }). Try removing node_modules and reinstalling with pnpm install (keep pnpm-lock.yaml: it pins the dependency versions).
After the project updates pnpm, run pnpm install once in a terminal and confirm recreating node_modules: otherwise pnpm run … from an editor or a git hook stops with ABORTED_REMOVE_MODULES_DIR_NO_TTY. The error packages field missing or empty means pnpm 9 is installed: update it (npm i -g pnpm@latest).
Where to edit this guide
Russian guide sources live in docs/guide/. English mirrors are in docs/en/guide/.