
miniShop2 settings
miniShop2 settings are in a separate section accessible from the menu.
All tables remember column width and position. Multi-select with Ctrl ⌘ Cmd or Shift works everywhere.
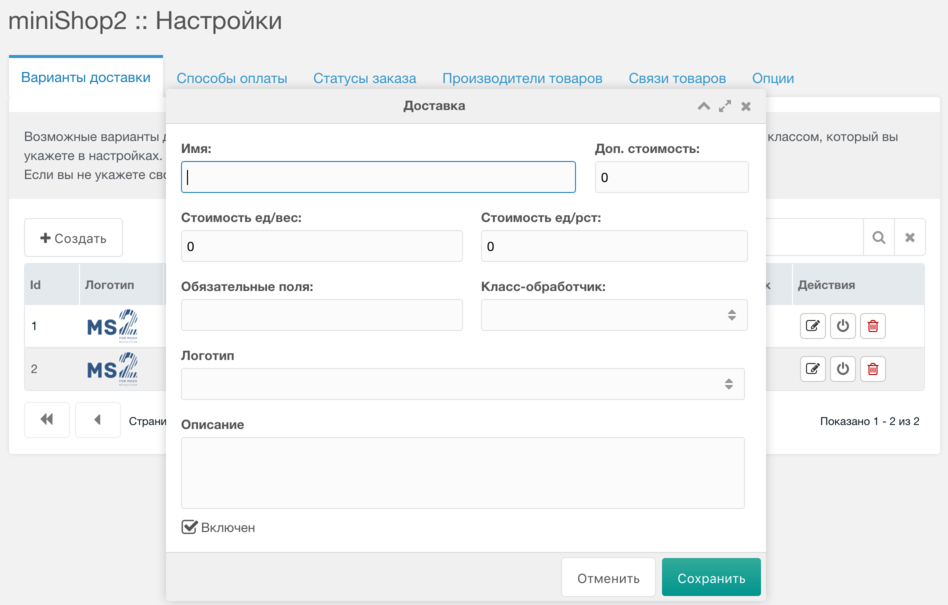
Delivery
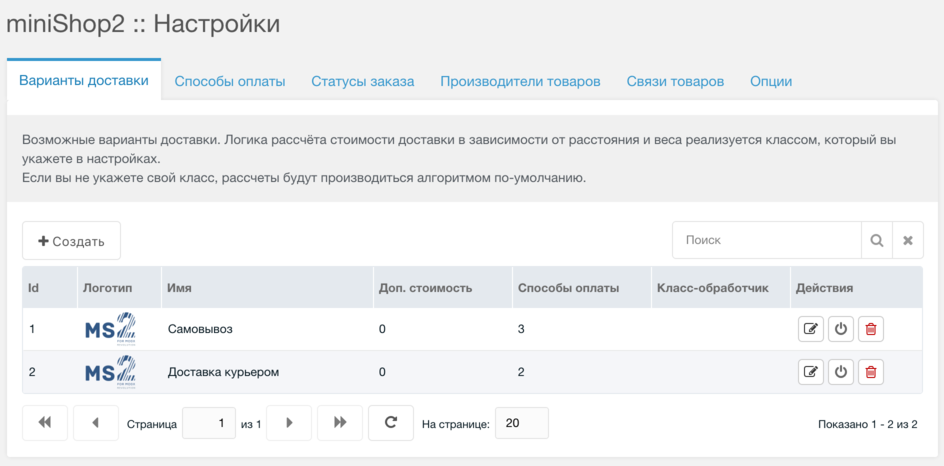
You can create delivery methods with custom logic handled by a custom class set in settings. The class is optional; if omitted, no special order handling is applied.
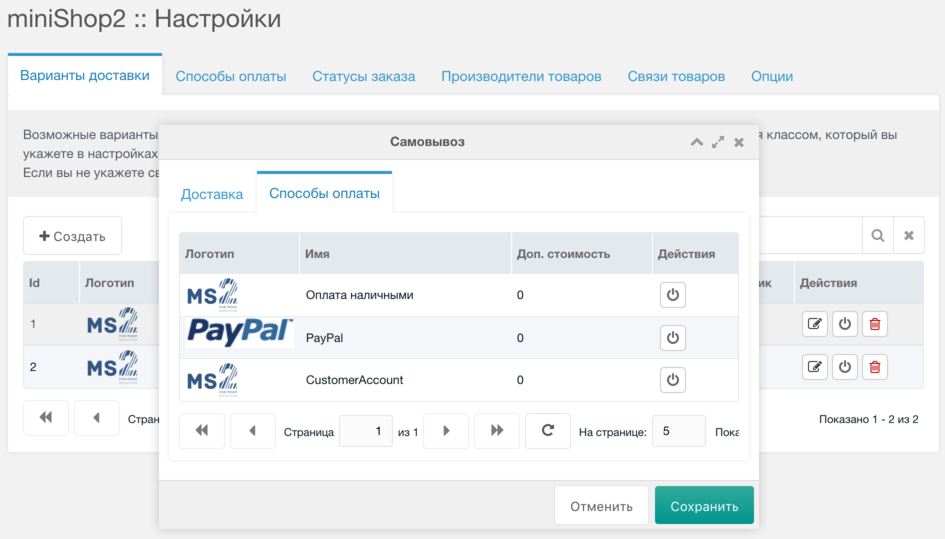
Each delivery method is linked to payment methods in its edit window.
Payment
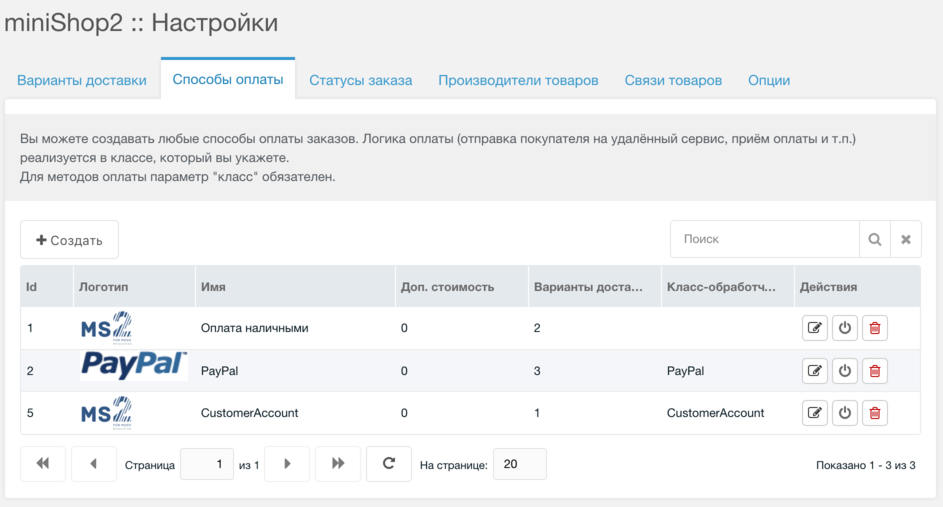
Payment methods are attached to orders and must implement their own logic. Usually they send the user to an external payment service.
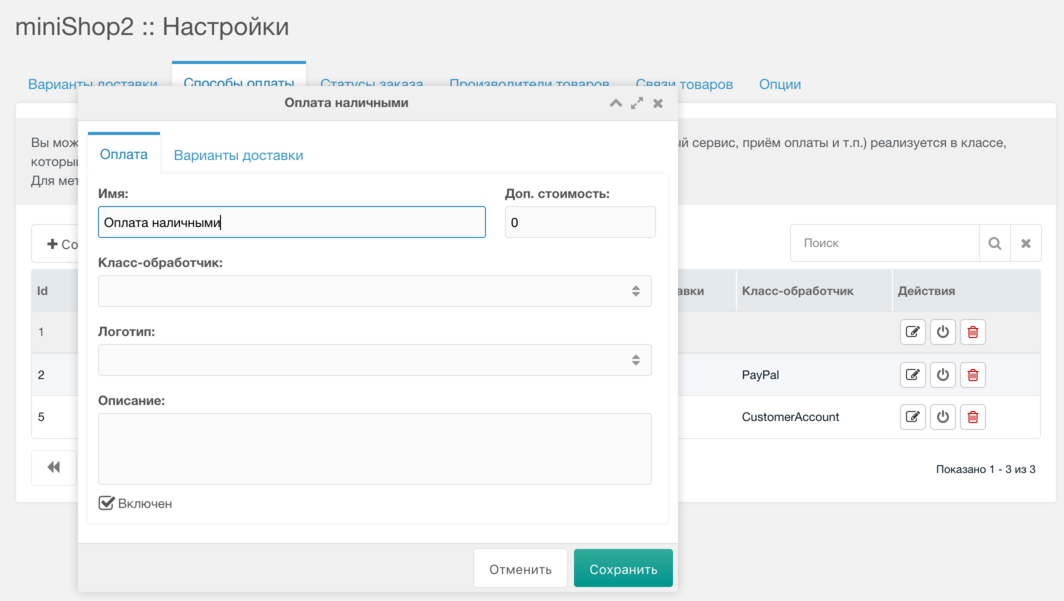
Specifying a payment handler class is optional.
Order statuses
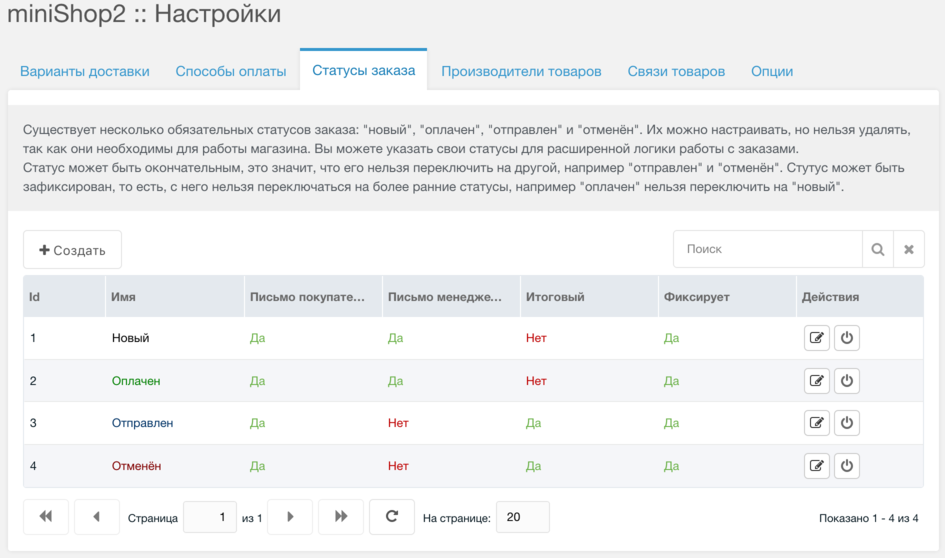
There are several required statuses:
- Draft
- New
- Paid
- Shipped
- Cancelled
They can be configured but not removed; they are needed for the store. You can add statuses for custom logic in your class.
A status can be final — it cannot be changed to another (e.g. "Shipped", "Cancelled").
A status can be fixed — you cannot switch back to earlier statuses (order is set by drag-and-drop). E.g. "Paid" cannot be switched back to "New".
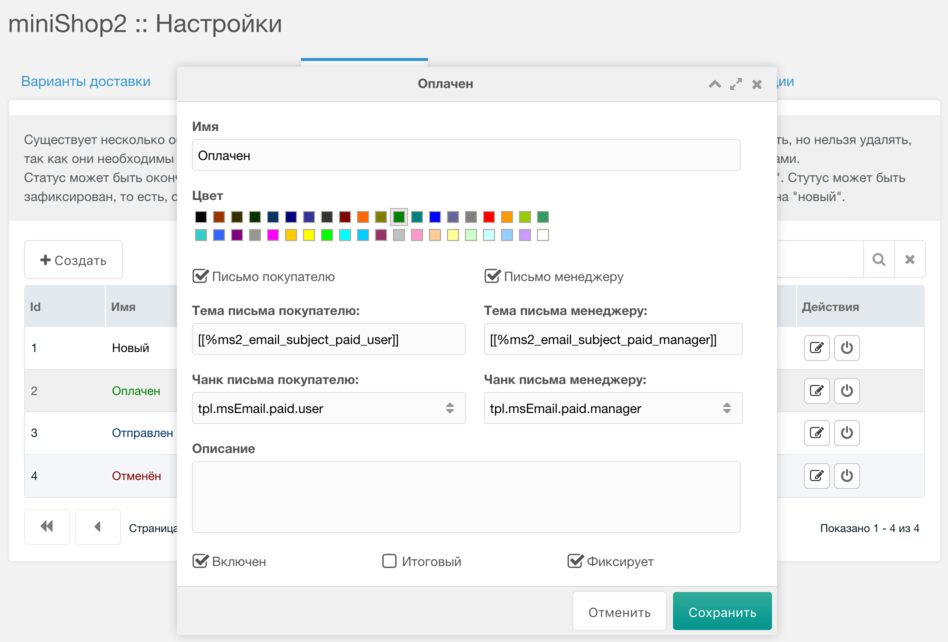
Each status can send emails to the customer and to managers set in ms2_email_manager.
Email content uses chunks set in the status. All are processed by pdoTools, so you can use Fenom to inherit a common email template.
Vendors
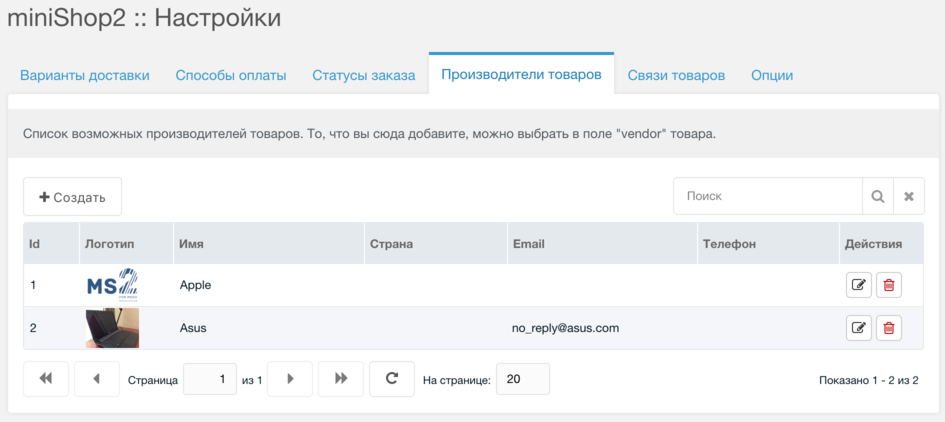
Here you define product vendors, which are then selectable in product properties.
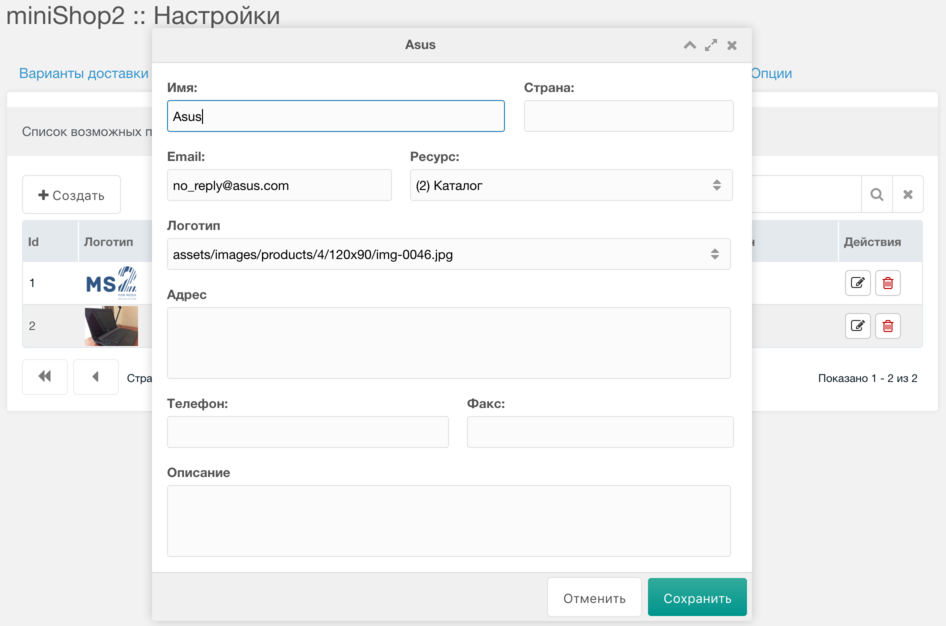
Each vendor can have custom properties and a link to a site resource (e.g. for a vendor page).
Product links
A simple tool to group products by any criterion.
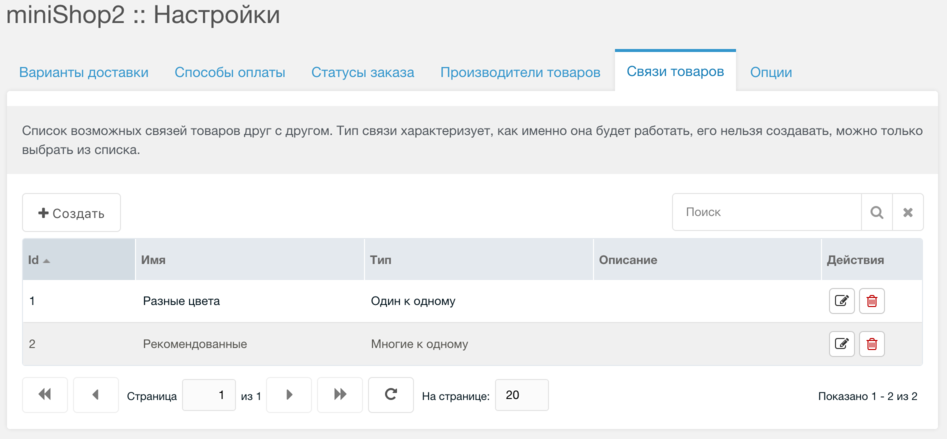
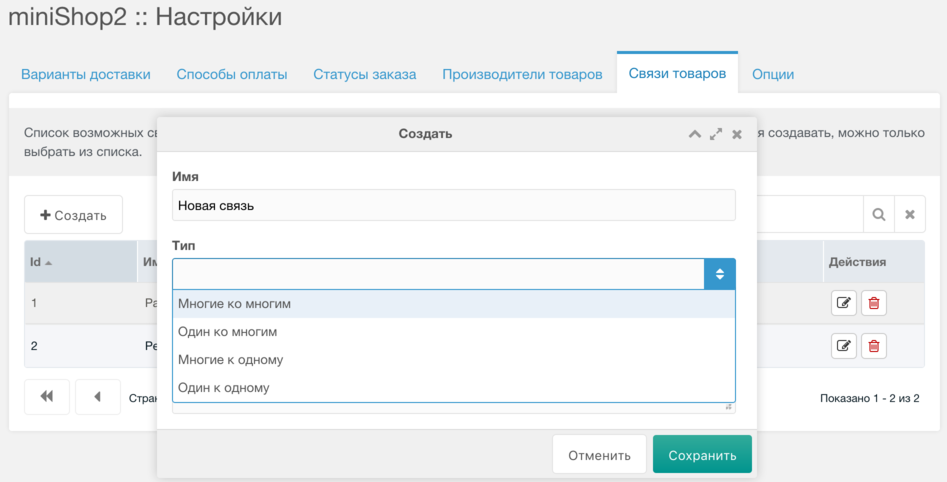
Link types (choose one of four):
- One to one — bidirectional equal link between two products.
- One to many — one product linked to several; children are not linked to each other.
- Many to one — same as above, reversed (child links to parent).
- Many to many — equal multi-way link; adding a product to a group links it to all members.
Use links for products that differ by one parameter, or for promotions (e.g. show related products on the product page).
Storage
To add a link, select a link type and the product to link.

In the database, links are in msProductLink (3 columns):
- link — id of the link in
msLink(created in settings) - master — main product id
- slave — linked product id
One to one — link product 10 to 15 → 2 rows: (10,15), (15,10).
One to many — link 3 products to 10 → (10,15), (10,16), (10,17).
Many to one — link 3 products to 10 → (21,10), (22,10), (23,10).
Many to many — link 3 products to 10 → each product is linked to every other in the group.
Query
Create a snippet and select product ids by link and master (for many-to-one use slave instead of master).
php
$q = $modx->newQuery('msProductLink', array(
  'link' => 1,
  'master' => 10,
));
$q->select('slave');

if ($q->prepare() && $q->stmt->execute()) {
  $ids = $q->stmt->fetchAll(PDO::FETCH_COLUMN);
  print_r($ids);
}
Use the resulting ids as needed.
Examples
Different colors (several product variants with their own images and prices).
Recommended products (shown in cart at checkout).
Product sets (links to other items in the set on the product card).
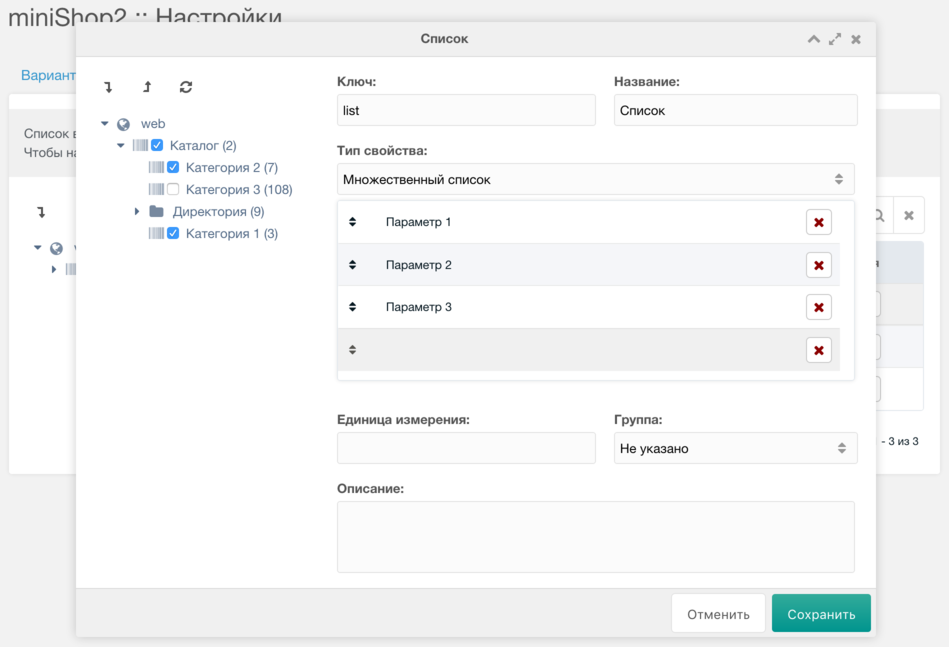
Product options
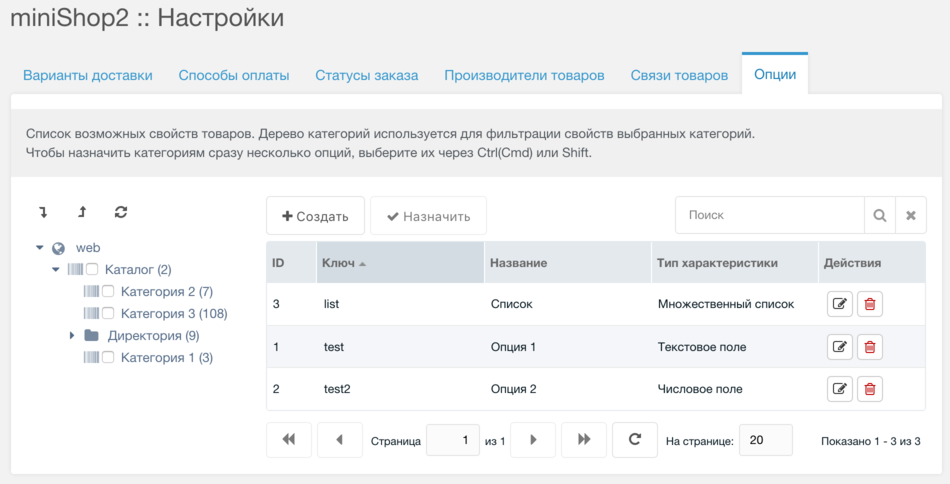
To create an option: click "Create" and fill in:
- Key — identifier and placeholder name on the frontend. Required.
- Title — display name.
- Description
- Unit
- Group — MODX category; shown in the product options tab
- Property type — value format
Filter options by the category tree on the left. When creating an option you can assign it to categories via the tree.
Options appear on the product page in the options tab.
Use snippet msProducts to output product options.